Relay Muzak is an audio-visual composition focused on the idea of overstimulation. The blinking of the LED lightbulbs is sporadic and aims at diverting built-up expectations. The clicking of the relays are in many ways synonymous to the rumble of a film projector. It’s an added component that is not the main focus, but one that compliments the visual media.
The completed final project:
Gathering Materials
In order to build this project, I knew that I needed a few components:
- LED lightbulbs (x8)
- lightbulb sockets (x8)
- extension cords (x16)
- Arduino + connectors
- Tools tools tools
Learning about Relays
In my Electronics and Sculpture class, I learned about something called a relay. Essentially a relay is a programmable on/off switch. Therefore, one could potentially connect a bunch of electronics to a bunch of relays, and use an Arduino to control which of them turn on and off. Imagine a light switch in your room that you can turn on and off at an incredible speed. The project was essentially this idea taken to the extreme.

I went online and bought myself an 8-channel relay from Adafruit

I found a piece of wood in the back on which I could mount my 8-channel-relay on
One consideration I had was the kind of Arduino I should use to control the on/off rate. I began experimenting with an Arduino Nano, but in the end decided to go with the Uno instead as it had an input barrel jack.

At this point, I just simply wanted to test turning relay on and off to see how the thing actually functioned.
I took a lamp and plugged it into a spliced extension cord which was connected to one channel of the relay. The original lamp plug remained unscathed but the cheap extension cord gets transformed . More on this later.
I also found out that gaffers tape would be my friend throughout the project. I gaffed my connections to the piece of wood, and plugged everything in. Since I am dealing with AC current, it’s important to be careful.


A brief video showing my first experiment:

I began to experiment further with more sporadic patterns, and began to hook up more and more relay channels to my Arduino.
Since I had only one light at the time, you can only see its flashing yet still hear the clicking (turning on and off) of the other relays.
Creating the Lightbulbs
Now, it was time to purchase the main components for constructing my lights. I went to the local dollar store and bought sixteen extension cords (eight to create the lightbulbs, and eight to create extensions from the lightbulbs to the relays). They were 6 feet each, and I felt that this was a good length to start with.

I also picked up eight lightbulb sockets. Note the off-color one at the bottom right of the photograph. I picked it up because the store I bought the others from ran out. However, it stood out like a sore thumb and generally looked distracting, so I eventually went back to the store when they restocked and bought another one.

The last items that I need were the actual lightbulbs. I spent some time thinking about whether I should get LED lightbulbs or incandescent. In the end, I decided to go with the LED because:
- they were cheaper
- lasted for a long time (many years)
- didn’t get hot
- made out of plastic
As I went on with the project, I eventually realized that they are EXTREMELY advantageous and are able to be turned on and off VERY quickly. They are made of plastic which helps with my clumsy self and are overall an amazing purchase. Plus, they’re supposed to last me 9-18 years, so if anything, I have set up my living house with lights for the next 20 years.

Now, it was time to figure out how to wire up my extension cords to my lightbulb sockets. I read online that it’s a potential safety hazard if they were to be connected backwards, so I made sure to do plenty of research first.

Here is my socket taken apart:
First, I had to grab my extension cord, and cut off the end with the multiple plug holes.


I then split the cord down the middle and stripped a bit of wire off each side.

I threaded the butt of the socket through the wire before I did anything else. It’s annoying figuring out that you forgot to thread it through after connections are made.
I discovered something called the underwriter’s knot. This is a knot essentially used as strain relief. If the cord were to ever get yanked, the wire won’t slip from the screws, severing the connection.

It was now time to hook up my prepared cord to my socket. However, how do I know which of the connections is hot and which is the neutral? Well I learned that the plug itself is a giveaway about what it sends.
On the end of the plug, the wider prong is hot, and the narrower prong is neutral. At that point, you just have to follow that cord all the way from the plug up to the socket. The hot cord gets attached to the gold screw and the neutral to the appropriately cold and blue-ish screw.

In the picture above, note how the cord on the right corresponds to the hot connection and the one on the left corresponds with the neutral.
Now, I put the cover back on and sealed up the whole socket nicely.

I tested the lightbulb and was thrilled to see that it worked and that I wasn’t mortally electrocuted.


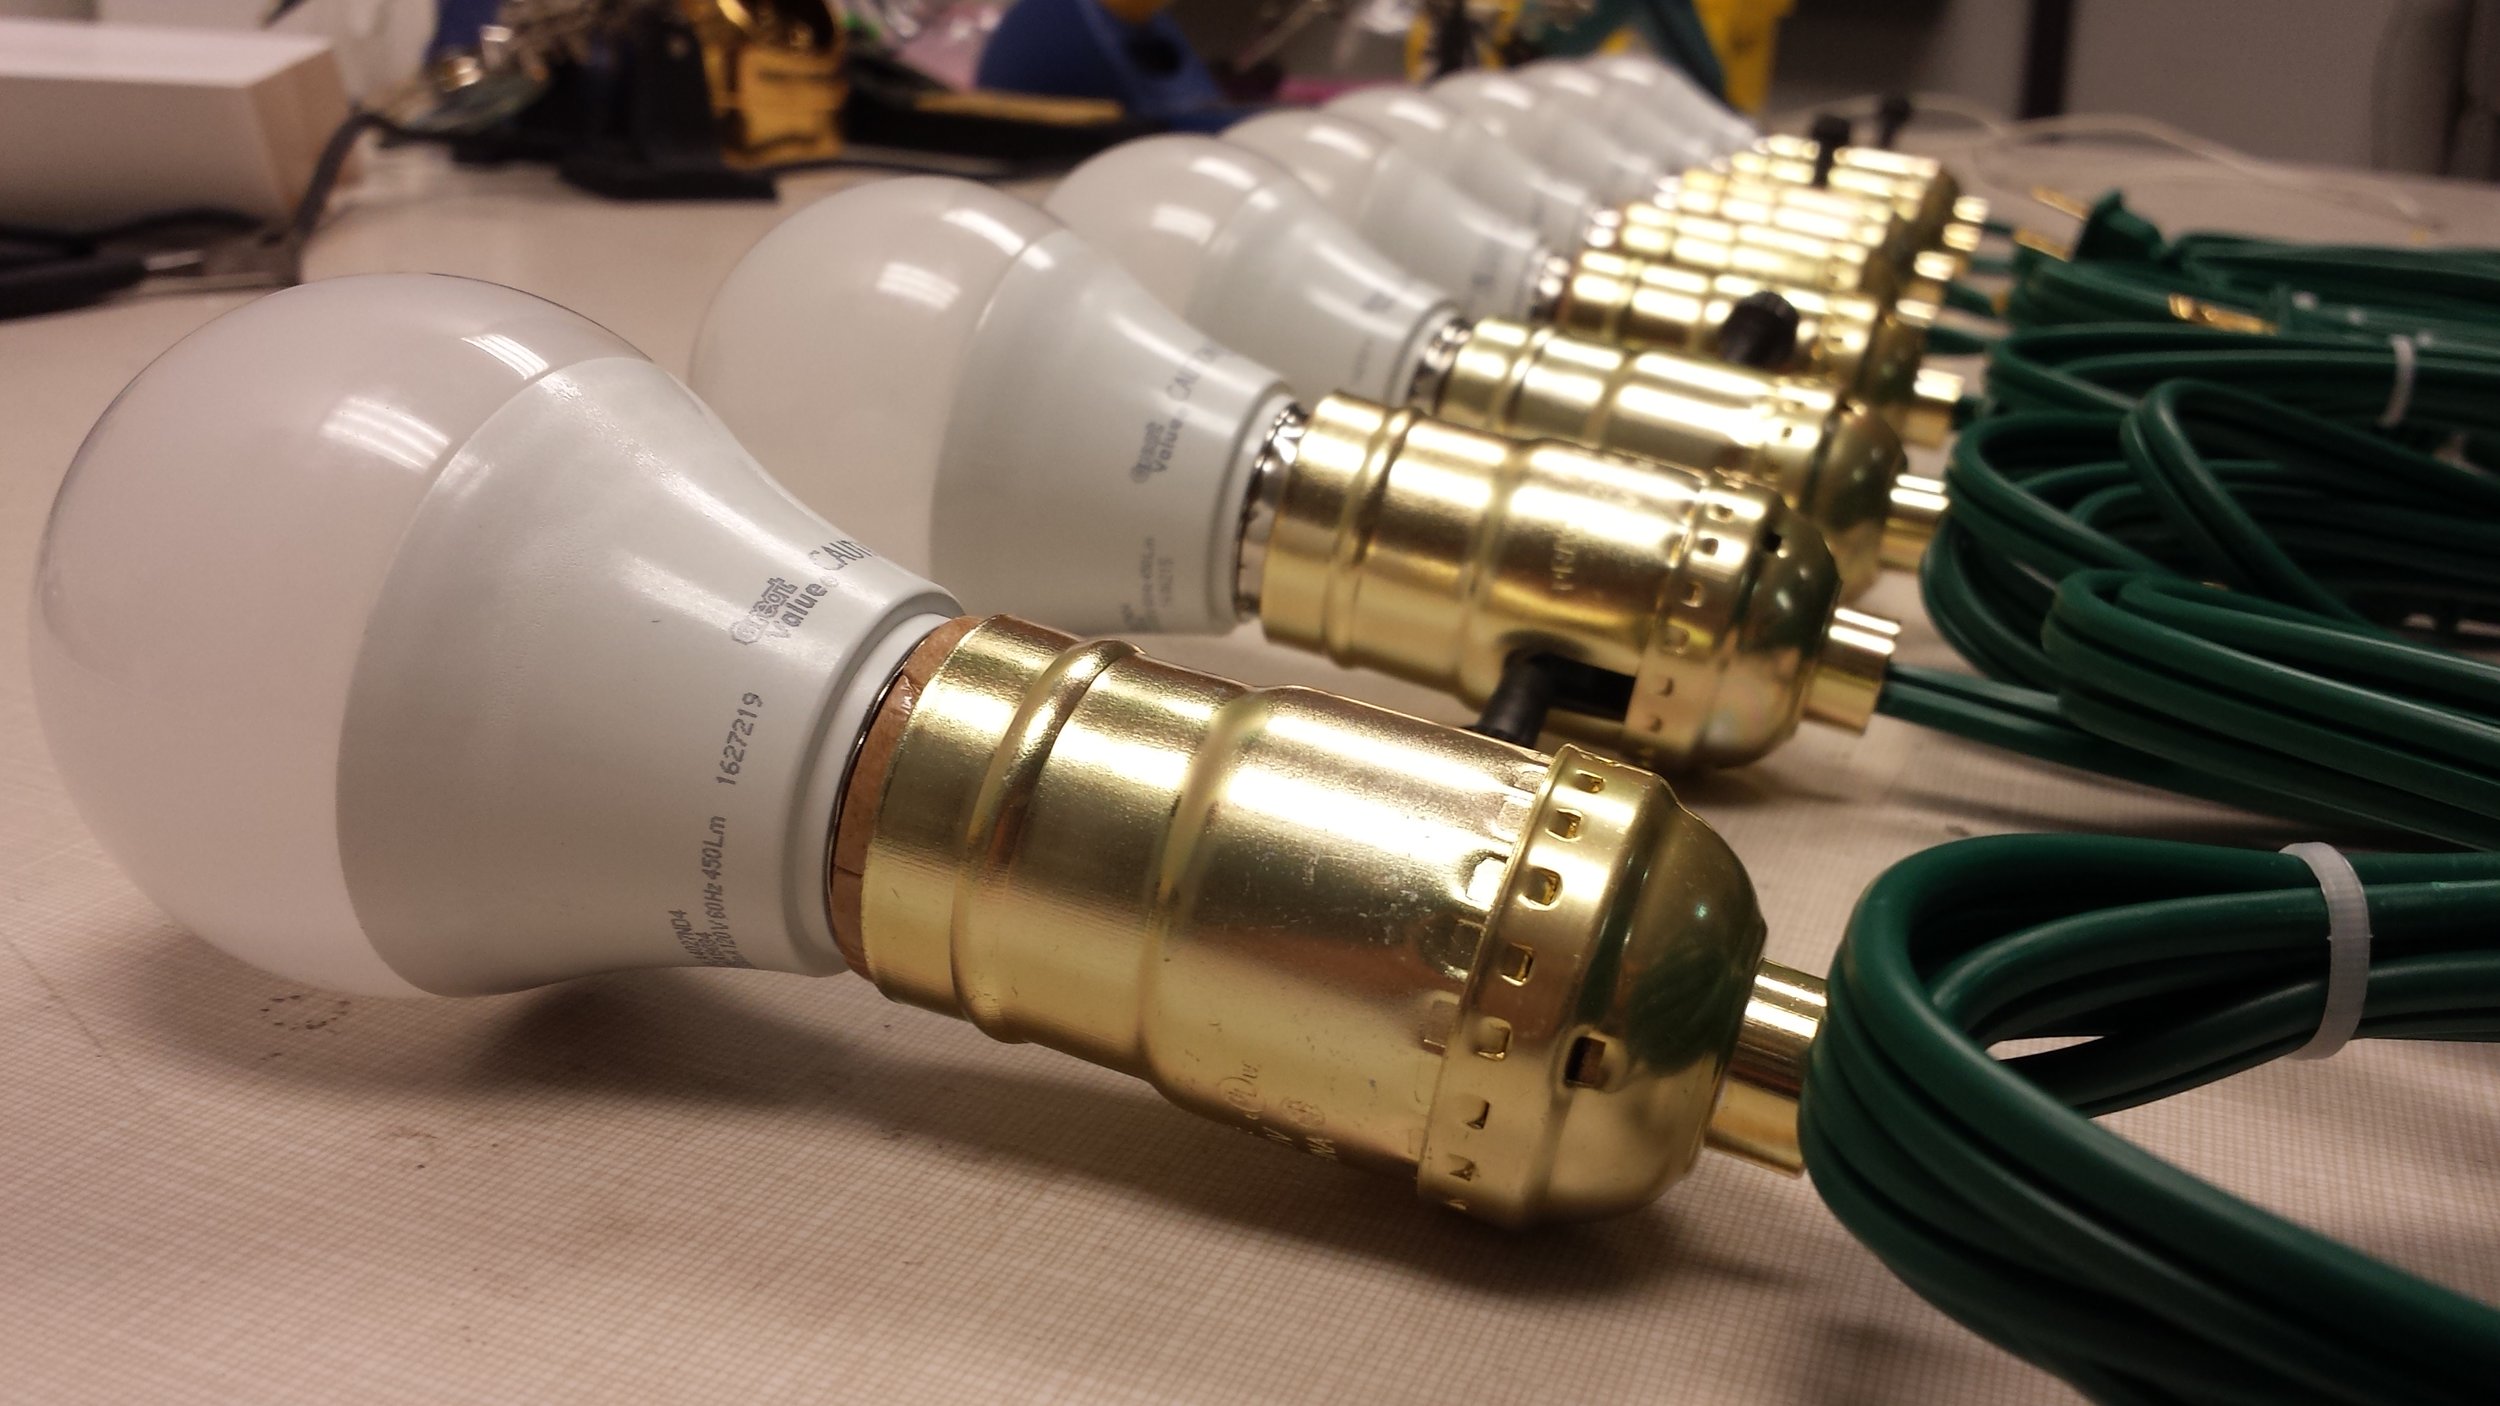
My first completed lightbulb!
After doing this seven more times, I had my array of lightbulbs.
Connecting Lightbulbs to Relays
Now, it was time to connect the lightbulbs to the relays. These are the eight extra cords which are utilized as spliced extension cords for lights.

At about the halfway point, I cut one of the wires of two, and inserted eight of them into their own discreet relays.

Gaffers tape was absolutely necessary to take strain off the wires and to protect myself from electric shocks.
After some time, I hooked all eight of them up to the relays, secured them with zip ties and gaffers tape, and organized the cords.


I then hooked up my Arduino to the relay.

I bought a power strip and a small plug splitter so that I could fit all eight of my AC lightbulbs.


Now, I plugged into the power strip and switched my Arduino on:
A success!
Setting up the Project in the Space
The last and most important step was to hang up my installation in the hallway. As a side note: the location is quite dark, so there is only so much that I can show you.

Since I wanted to have my lightbulbs hanging from the ceiling, I found a spot a little out of the way and on the side. I climbed up the ladder and took a closer look. I felt that this was the best place to mount my project. I got out the gaffers tape and after dusting, attached my circuit to the top of a fluorescent light.


I found a good way to secure the cords was to just tie them to the existing beam using a simple knot

Here was the result. I spread the lightbulbs as far apart as I could.

Since there was no AC power by my installed lights, I had to extend a cord (yellow) several feet from a plug towards my direction.

I then taped my power strip to the other end of the top of the light.

I found a nice little connector to power my Arduino using a 9 volt battery.

A little video of me running through the setup in the rafters:
Now, all was functioning correctly:

Side angle of my working lights:
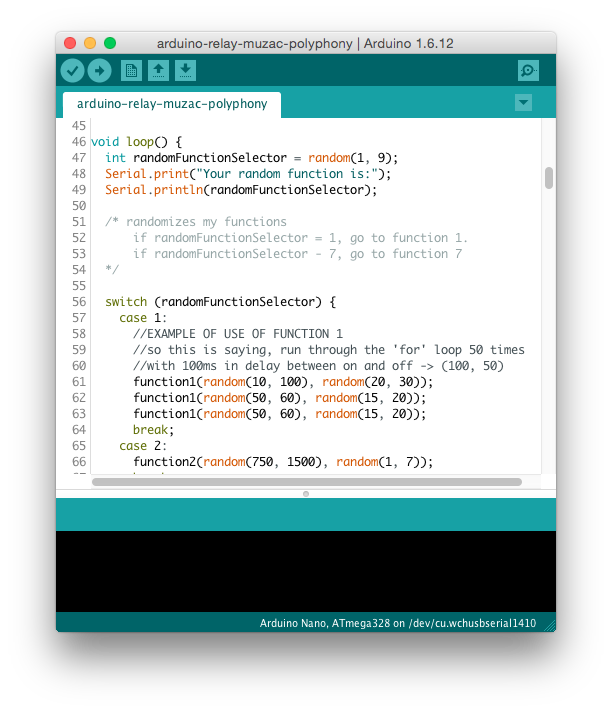
A Note about the Code
I haven’t spoken about my code yet, but wanted to take a second to explain how it functioned. Essentially, the code exercises randomization within parameters. I took this opportunity to practice writing functions. I wrote eight functions. One function per relay. Each function was associated with how many relays were on at the same time. Function 5 = five random lightbulbs are chosen to turn on and off. Function 3 = three random lightbulbs are chosen to turn on and off.
I found that the best result was a balance between very quick gestures and slow ones. It’s the contrast that makes the piece effective and that helps the audience focus on both the visual and sonic aspect of the piece.
Takeaways and Future Improvements
In retrospect, I found that this project went surprisingly smoothly and I didn't really have to redo anything. There were difficulties, but I felt comfortable with them overall. However, I feel like if I had to redo the project, there would be some things that I would want to do differently:
- I wanted to have audience interaction. My initial idea was to have an instrument (like a synthesizer) on a pedestal that the audience could interact with. The flashing of the lights would be a response to the sound.
- Many individuals complained that the incessant flashing was a bit much. A diffuser would take the harshness of the light down, although it would go against the initial concept of the piece.
- I could have written the code better. Instead of having seven functions, I could have just one with three variables instead of two. Coding is something that I’m still working on and continuing to improve.
- If I ever wanted to create a version of this piece with inaudible clicking of the relays, I could use solid state relays. It's something to keep in the back of my mind.
In the end, I feel satisfied with this project and feel that I set realistic goals, was able to learn how to control high voltage AC using an Arduino and relays, and have had an opportunity to explore a new aspect for me in art making.
Thanks for reading!